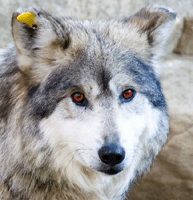
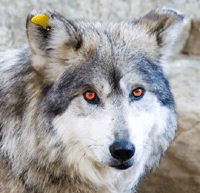
So, you found the perfect image for your RPG graphic — except the hair, fur, or eye color is wrong. Your roleplay character has green eyes, but this model stock image has brown eyes. What ever shall you do? Well, you’d do well to read all parts of this tutorial, first off. Even if you only want to colorize your roleplay character’s hair, principles learned in the eyes section can apply to hair, too!
Try some simple image colorizing tricks to adjust your play-by image to the perfect hue. They don’t always work — especially when you’re new to Photoshop or don’t want to spend hours tweaking something. However, they are simple and not very time consuming — you can “spot test” your character image with a small brush and some different colors to see how it will colorize before you spend a ton of time erasing and perfecting the color overlay.
Before you color a thing, though — remember to think about realism in your roleplaying game. Do they allow naturally purple-haired roleplay characters? Or only dyed purple hair? Make sure you’re adhering to RPG rules!
Step One
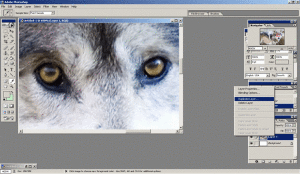
Go and get a picture — see Forum Roleplay’s Finding Roleplay Images for further information about where you should look and what to look for. The image should, without any edits on your part, look as much like your roleplay character as possible.
The discrepancy should be with color — hair, eyes, fur, shirt or pants color. You’re only editing colors, not entire aspects of the image. Editing features and changing bigger parts of an image to match your roleplay character is much harder, and is generally not worth the effort for RPG graphics.
Tancread of Flickr supplied this Creative Commons wolf image.
Open your image in Photoshop. Duplicate the layer your picture is on and hide or lock the original layer. Keeping a copy of the original image handy is great if you screw up big time!
Step Two
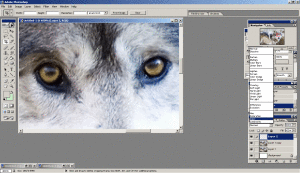
Zoom in close to the eyes. You want to be able to still clearly see they are eyes (not pixels), but close enough to give precise coloring.
Step Three
Create a new, blank layer. Change its blending mode to “Color.” This will allow you to color your layer without altering the image below.
Step Four
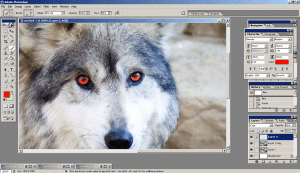
Use your brush tool in the color of your choice and color the irises. It may help to get a cleaner effect if you mess with the opacity and the flow of the brush, especially near the edges. Depending on the color, intensity, etc, you may have to create a new layer and redraw the pupils — the eyes almost never look as realistic when you have to do this, so try not to.
This guy could be neater, of course, but this is only a quick tutorial. You can always erase the edges of your image and get pixel-perfect, too. You also can get pretty fancy here with different blend mode effects, too. The first one is set to lighten rather than color, and the second is set to multiply. This is great if your forum roleplaying game allows color-changing eyes.
Hair and Fur
Brown, Red, Yellow, Orange
This works for almost any color. Black and white require specific techniques, covered later. Additionally, very light or dark colors require combinining both the black/white techniques (depending whether your wolf is very light or very dark) with this technique.
Create a new layer again, and set the blend mode to color again. You will want this layer below your eye layer. Again, use your brush tool on this layer in the color of your choice to draw over the fur. Most of the time, you will have to mess with the opacity. I recommend using a different layer for each color you add.

It also helps if you use slightly similar hues. Look at a real object — its color is not a flat, single shade (which is what you achieve with color blending mode with a single color layer). Your wolf is black? Use a small, soft brush to add reddish, chocolate brown, or indigo blue hues to their fur. Use a little bit of light grey to go over areas of highlight. This helps add depth to your color and aids in making it realistic.
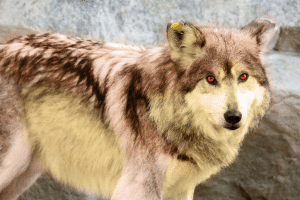
This wolf got a light brown for his body, a copper brown for his back, and a yellow for his underside. His colors aren’t exactly realistic, but he’s passable. If you just color with the brush, you’ll get a funky “color halo.” Go in close and precise with the eraser to get rid of it.
Gray, White, Black
White and black are difficult to achieve and keep detail, so you if you have a black/white color change, it’s easier to just stick to images that already come in those colors. If you are determined to try, though, you can usually achieve something passable.
Gray & Black
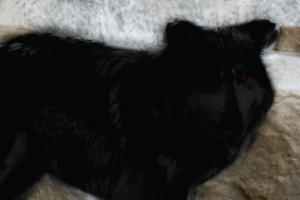
Create a new layer, set the blend mode to color. Paint over your desired color-change area with black. This turns it gray. Duplicate this layer three times, setting each of the new layers to Overlay blending mode. Set the third layer’s opacity to 50%. Sometimes you need a few more/less layers, depending on the brightness and other aspects of the image. Create a new layer, and leave this one’s blending mode at normal. Paint over any spots that are still too bright, and adjust the opacity of this layer until you can see a bit of fur detail, but it’s still black.
Gray & White
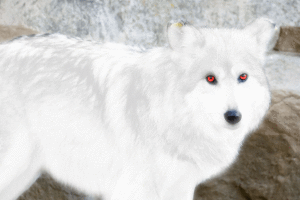
Create a new layer, set the blend mode to color. Paint over your wolf with white. This turns the wolf gray. Duplicate this layer once, and set the blend mode to screen. You usually only need one of these, and you usually need to reduce the opacity a fair bit to get your fur detail back. If there are any spots that still appear too dark, create a new layer with the blending mode set to Normal, and paint over them with a very low opacity white brush until you achieve your desired color.
